Sewing a Magical Nature Wand
Get ready for a magical summer by making this nature wand with your little one! 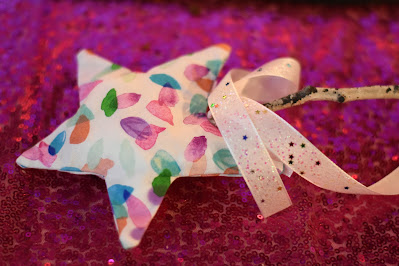


Ribbons are so much fun to add to the magical wand. They flow in the wind and make it extra special for your young sewist. We added the ribbons by tying them in a knot around the stick.


This sewing project allows young sewists to practice techniques such as clipping corners, turning inside out, and pressing.
Materials needed:
- Star Pattern
- Fabric
- Scissors
- Stick
- Stuffing
- Glue
- Optional: sequins, ribbons

Begin your adventure by going on a nature walk to find the perfect stick for your wand. Optionally, you can choose to use an 18" dowel, decorating it in any way you choose.
Trace and cut out two stars.


Pin the star right sides together and use a ruler to draw a 1/4" seam allowance. This will make it easier to navigate and stay straight while sewing the points of the star. Sew together, leaving about a 1 inch gap at the bottom of the star.


Now, it is time to clip those corners. Clipping corners allows us to get a nice crisp point when we turn the star right side out. Using your sewing scissors, cut the excess fabric off using a diagonal line. Be careful not to get too close to the seam! Clip a notch in the corners of the points and trim the seam allowance to 1/8".


Turn inside out through the hole and push the corners out with a chopstick.
Press well.
Put some glue on your stick and insert it into the star. Once it is dry, sew the opening closed by hand.


Your wand is finished! Time to make some magic. :-)


Comments
Post a Comment